The owners of spacious rooms or country houses try to add as much decorative furniture as possible to the interior. Golf enthusiasts will make a clearing with a beautiful lawn and holes in the backyard. The footballer will set the goal. A table tennis lover will put a decorative table in the entertainment room or in the courtyard. Table tennis is a good option in both cases. Playing this sport derived from tennis, you do not get tired very much and develop a reaction. It will help pass the time and have fun both for children and adults.
But a tennis table costs a decent price, given its simplicity in design. The prices for such a table range from 25 $ -90 $. Of course, with skillful hands and simple technical devices, the best option would be to assemble a tennis table with your own hands. How to do this and what is needed for this is worth considering in more detail.

Dimensions of the tennis table
To make the game convenient for adults and children, it is worthwhile to correctly approach the miscalculation of sizes. In fact, the exact dimensions of this product are not. Different manufacturers make different tables, but in appearance their dimensions are difficult to see. They are made convenient for average people by height. The most optimal option will be the following sizes:
- Height - 0.95m-1m.
- It is long (both sides) - 1,9m-2,05m.
- Width - 1-1.3 meters.
If you can imagine this table, then make sure that its dimensions are really convenient. The height of the structure will be optimal for all players. And the platform (on one side) 1 × 1 in meters is accessible to the range of hands of adults and children. Having learned about the dimensions of the product, we turn to the detailed instructions.
How to make a do-it-yourself tennis table
As already mentioned, there is nothing complicated in making a tennis table. First of all, you need a drawing. You can depict it yourself or using a photo from the Internet.
Blueprints
Without any troubles, draw the dimensions of the countertop (remember, it should deviate from the supporting structure by at least 20 cm so that players do not touch it with their feet). Next, depict a holding structure consisting of 4 legs, interconnected by additional components.

Instruments
After creating the drawing, we will prepare the necessary tools:
1. Power saw (you can take a conventional hacksaw).
2. Meter or tape measure.
3. Level (to balance. In the tennis table, this is very important).
Now that the tools and the drawing are ready, it's time to start choosing materials for our treasured table.
Material for countertops
The main part of the tennis table is indicative. It plays a key role not only in design, but also in the convenience and comfort of the game. There are many options for choosing material for the countertop. We will take only a few of them and consider the pros and cons of each.
- Styrofoam. Plastic foam has some advantages for this role, but there is one big drawback - a low coefficient of rigidity. Even if you take the most dense grades of this material, you will not see the natural jumping ability of a tennis ball, it will fade by ~ 15-30% (depending on the grade of PP). Otherwise, a very good option: minimum cost, easy handling.
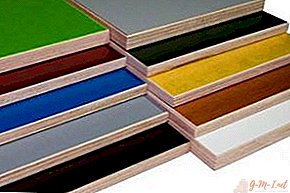 Plywood. Plywood is a multilayer wood panel consisting of veneers of different varieties of wood. Plywood is also a good option for creating countertops. Unlike polystyrene, plywood pushes the ball away from itself with full force. But if you take the thin subspecies of plywood, then the countertop will delaminate over time or at the first application of paint. If you can find plywood boards, then this option is quite suitable!
- Chipboard. Most table tennis tables are made from wood chipboards (chipboards). This material has all the best qualities and is best suited for this role. A dense, resistant and cheap panel is perfect for making countertops, but in order not to bother with processing, take the highest quality varieties. Their surface will be smooth, which will be a big plus. It remains only to cover the table with varnish or paint, but more on that later.
 Plywood. Plywood is a multilayer wood panel consisting of veneers of different varieties of wood. Plywood is also a good option for creating countertops. Unlike polystyrene, plywood pushes the ball away from itself with full force. But if you take the thin subspecies of plywood, then the countertop will delaminate over time or at the first application of paint. If you can find plywood boards, then this option is quite suitable!
We will take high-quality chipboard for the material. Let's move on to the base.
Base
The base consists of 4 parallel legs (in the best version 6) interconnected by additional boards so that the legs do not diverge due to the weight of the countertop. We will take the option with 4 legs. It is much more convenient, and slightly budget.
The main stage of work
It's time from all the blanks to assemble a full table according to the drawings. Let's start from the bottom.
To begin, saw off from the bars 4 identical legs a meter in length. You can measure them using the prepared roulette. Next, make connections for the legs.
To calculate how much it needs in length, subtract the thickness of both bars from another two meters and another 20-30 cm. In width - the same thing with only one meter, but it is unnecessary to retreat, there is nothing stopping the players. Having connected all four legs on top, it is recommended to strengthen the base in the same way, with bars in the middle of the legs. Having done everything exactly as planned, you will get a solid and comfortable base. To make a countertop is not difficult. Measure from a solid panel 1 square. m. and saw it off.

The second side is made in the same way, since they must be absolutely identical for both sides. Having prepared the base of the countertop, you can begin its secondary processing - varnishing and staining. Some types of chipboard are already processed for longer operation and do not need additional chemical treatment. fixtures.If your panel is worse in quality, then you have to treat the countertop with stain or varnish, for durability and a smooth surface. Be sure to carry out the treatment outdoors to avoid headaches and poisoning. Let both parts of the countertop dry for a couple of days. As a result, you get two identical panels with an area of square meter. If you wish, you can paint the table in your favorite color.
Construction collection
Now, the two main parts of the table are ready, it's time to assemble one whole from them. You can do this in three ways:
1. Connect with nails.
2. Using self-tapping screws.
3. Do not connect.
Manufacturers prefer not to screw / drive the countertop to the base, as there is a chance of misfiring during the game. The weight of the chipboard panel will perfectly hold the table without additional fasteners. Another plus - ease of transportation - countertops are easier to carry separately and in a horizontal position. It remains only to install the grid, and you can do it yourself.
Expert Advice
If you want to make the table more durable, just in case, add two additional legs in the middle to your drawing. Thus, the table can easily withstand even strong random collisions!
So, we hope you have figured out how to make a table with your own hands. Do it as an element of decor, or for sports activities - you decide. The main thing is that we were convinced of the budget and originality of such a table.

Leave Your Comment